How do I configure my Ricoh camera app to do multi bracketing?
We recommend using the multi-bracketing mode for the creation of 3D tour Pocket Websites. Photographers using HDR multi-bracketing mode get better image quality with less (or no) post-production editing from our tests and observations.
To assist you with our recommendation, we have developed a comprehensive set of instructions and features to work with HDR multi-bracketing properly.
It is important that you properly set the multi-bracketing mode to get great results. Failing to follow those instructions could lead to poor image quality.
Keep in mind that whatever technique you decide to use to produce your 360 images, if you achieve great image quality, you know you will have a great 3D tour.
To Start, select the settings icon at the top right.

Ricoh Z1 Setting Menu
Find the settings icon in the Ricoh Theta App and click on it to access the camera settings.
Z1 Multi Bracket Option
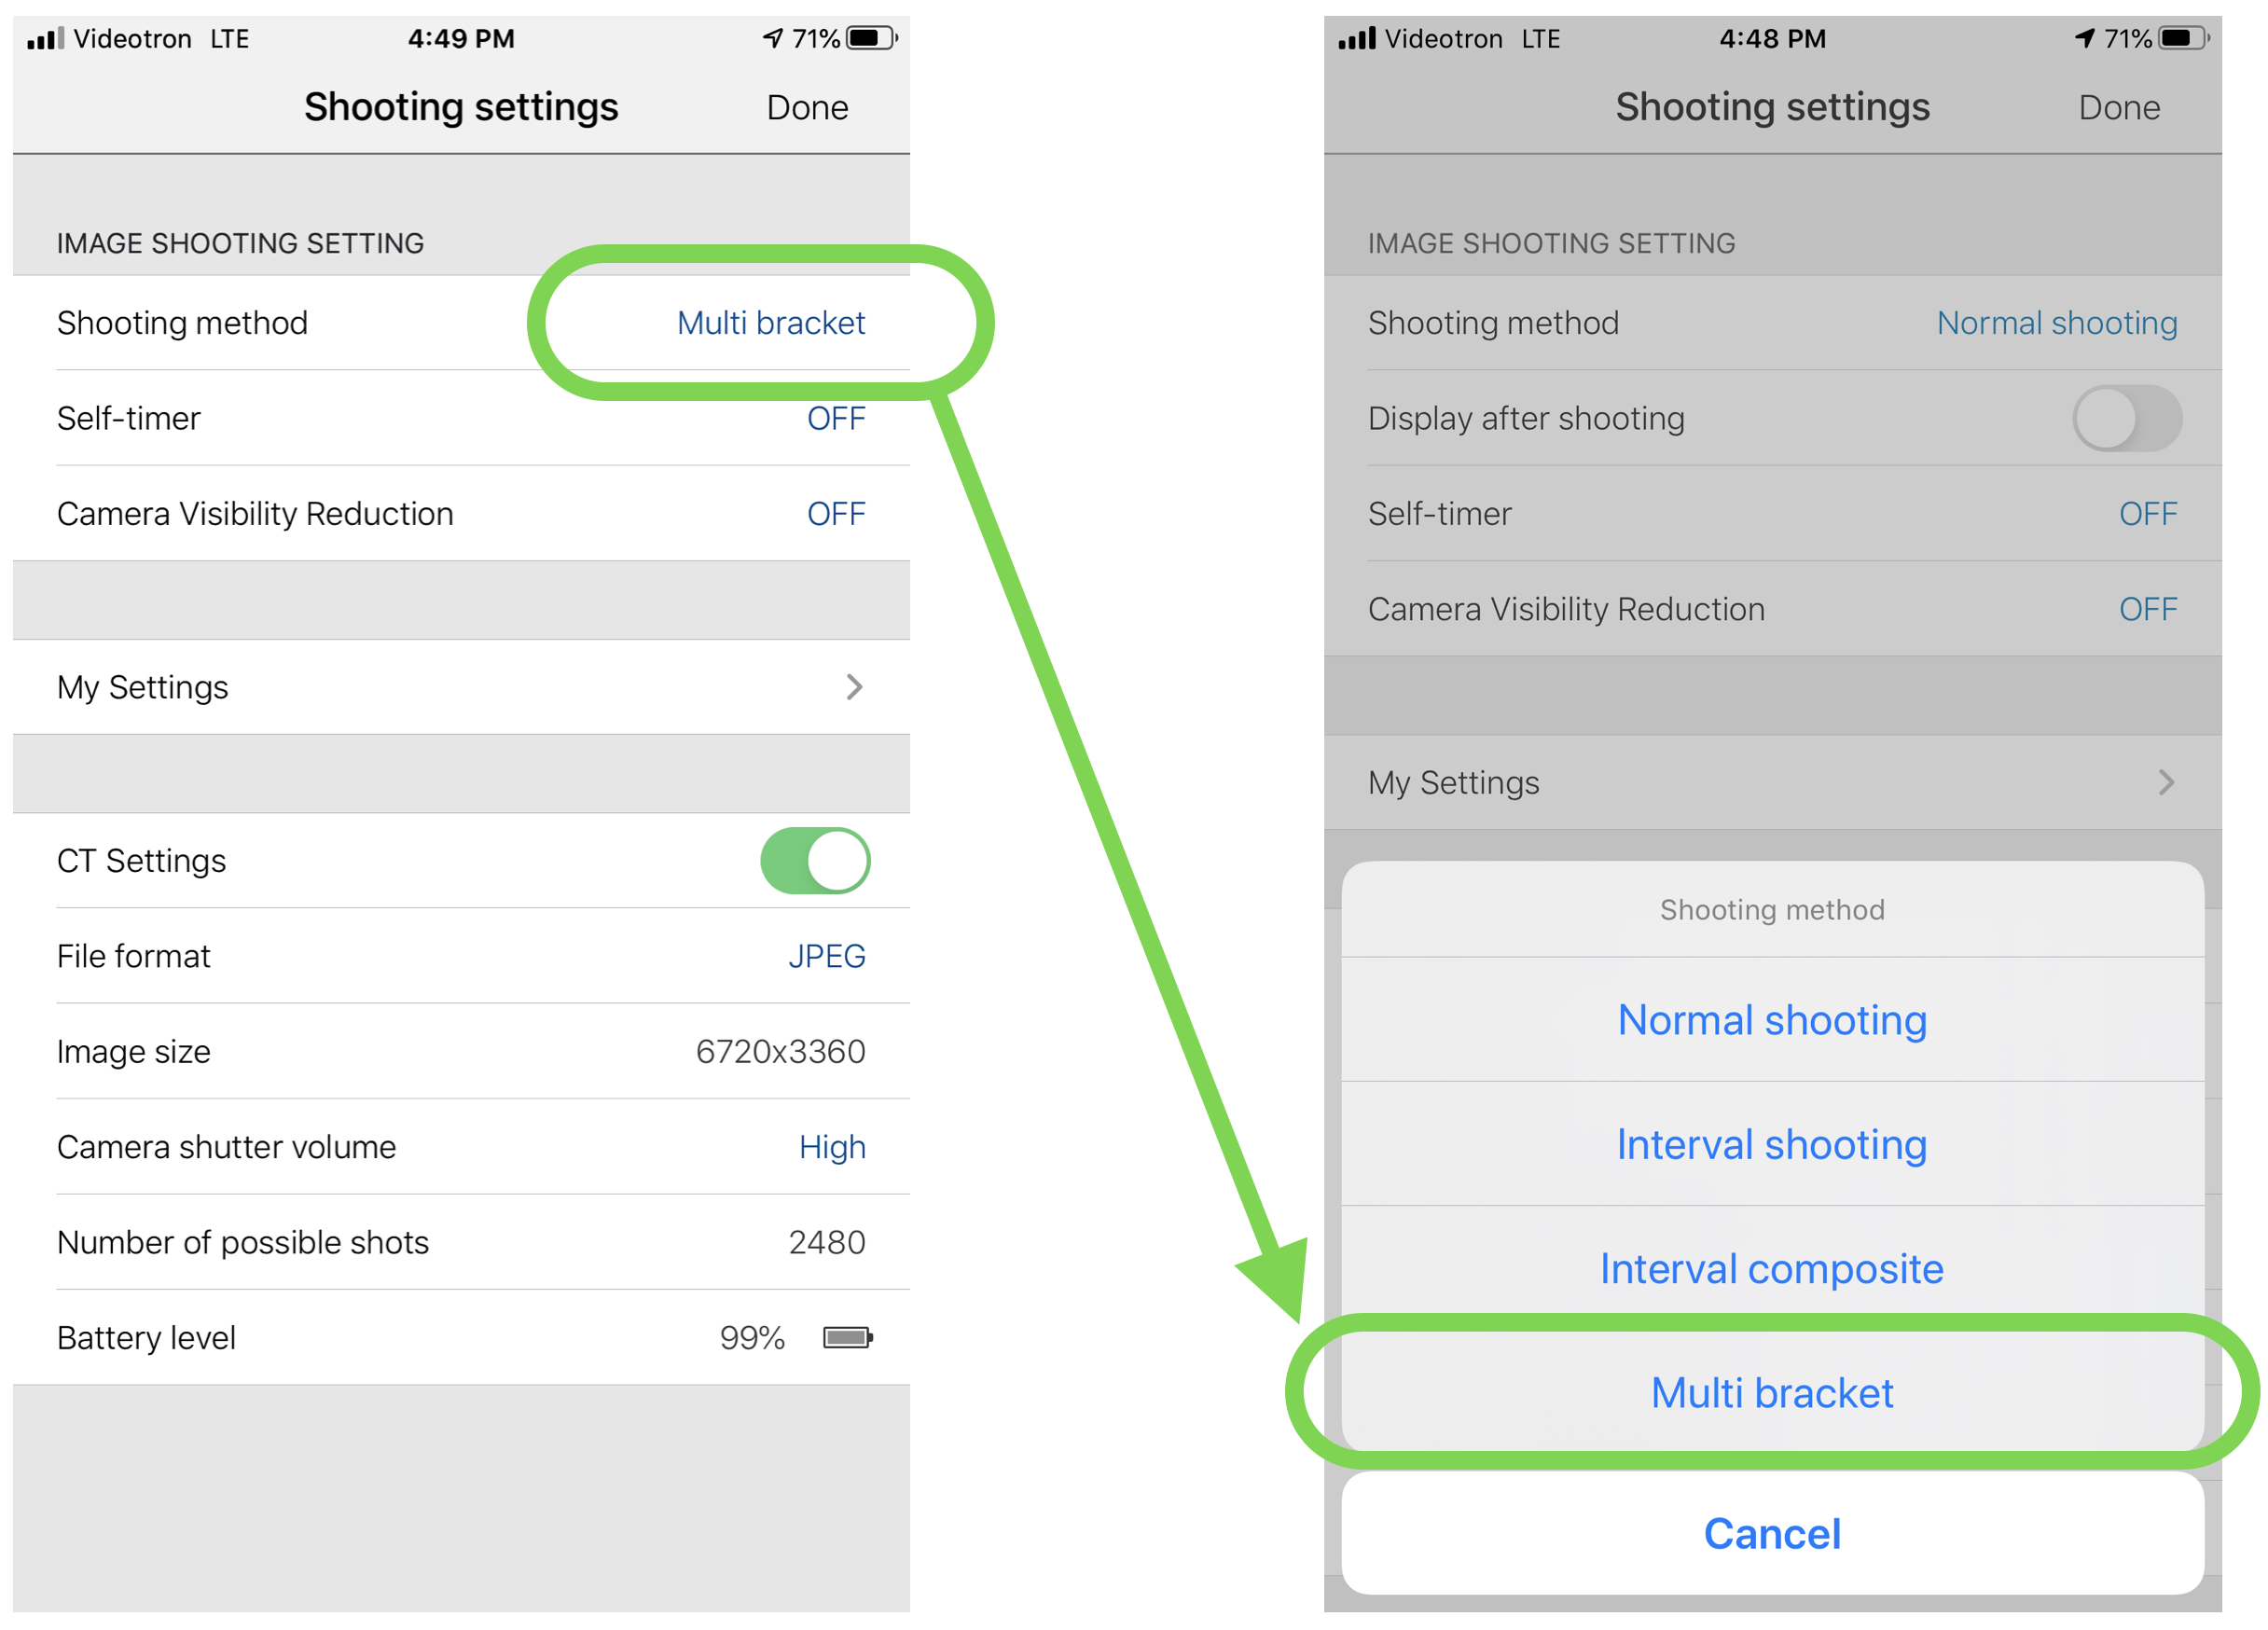
Click on "Shooting Method" and select the Multi bracket option.
You will be storing a lot of images with multi-bracketing. To avoid filling your camera memory, select only to save the jpeg format. The RAW format cannot be used with our HDR fusion in the Tourbuzz platform.
Use ( + ) To Add An Exposure
You will need to add one exposure at a time. You can use the + sign to add each additional exposure.
